
Notice:
This post is older than 5 years – the content might be outdated.
Executing Android Espresso Tests on a CI Server has always been a problem. Emulators are slow to start, tests take forever to finish or even fail because of timeouts or performance issues. One approach of solving this is to build a device rack and run the tests on real devices. But this takes a lot of time for maintenance and isn’t exactly cheap either. To make things easier there are cloud providers with device farms. Firebase TestLab from Google is one well known example. The API integrates nicely with a CI-Server and the reports are amazing. But executing a large test suite can take quite some time to finish as Firebase runs the tests sequentially. That’s where Flank steps in. The project is open source and developed by WalmartLab. It enables you to run the tests in parallel.
How Does This Work?
Flank takes your test suite and splits it in test groups called shards. You can configure how many shards you want to create. At maximum, you can have as many shards as you have tests. If you do this and everything goes well, executing all of your tests will take just as much time as your longest UI Test needs to finish (plus some startup and teardown time).
How Does This Work With Gitlab CI?
Integrating it with your Gilab-CI Pipeline is pretty straight forward.
- Create a Firebase Account
- Add your project to firebase
- Create a service account to get access over the API
- Configure Flank to your needs with flank.yml
Let’s have a look at each step in detail. For the demo I used the Android Sunflower App from Google. The project has 5 UI Tests integrated.
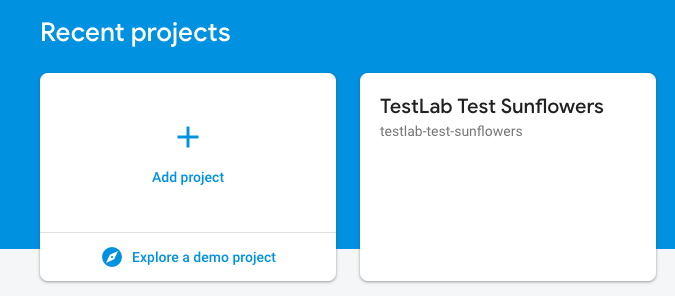
First create a new account or log in to your existing Firebase account. Now add a new project. Your project ID is shown below the title as you can see in the first image. This is used as the identifier when uploading your project’s APKs.
After that go the Firebase Settings and create a service account with an editor role. Download the json file which contains the private key which can be added directly as an environment variable in your Gitlab CI Project and used as authentication. Don’t forget to enable the Google Cloud Testing API and Cloud Tool Results API in the Google Developers Console API. This is important for uploading the APKs and accessing the results.

The next step is to configure your Gitlab Pipeline. As mentioned before add the service account as an environment variable in your project for authentication which is needed in the .gitlab-ci.yml. What you need to do is basically triggering a build of the project APK and the test APK. The artifacts get saved and uploaded via flank to the Firebase Lab. The pipeline setup might look something like this:
|
1 2 3 4 5 6 7 8 9 10 11 12 13 14 15 16 17 18 19 20 21 22 23 24 25 26 27 28 29 30 31 32 33 34 35 36 37 38 39 40 41 42 43 44 45 46 47 48 49 50 51 52 53 54 55 56 57 58 59 60 61 62 63 64 65 66 67 68 69 70 71 72 73 74 75 76 77 78 79 80 81 |
image: inovex/gitlab-ci-android:latest stages: - build - test before_script: - export GRADLE_USER_HOME=$(pwd)/.gradle - chmod +x ./gradlew cache: paths: - .gradle/ build_dev_debug: stage: build tags: - shared # Build your app and your test app. script: - ./gradlew assembleDebug - ./gradlew assembleDebugAndroidTest artifacts: paths: - app/build/outputs/ instrumentation_test_dev_debug: stage: test tags: - shared only: - dev before_script: # Preparing wget - apt-get update - apt install python2.7 python-pip -y - apt-get install wget # Activate google service account by copying the credentials to a file - mkdir -p $HOME/.config/gcloud/ - echo $SERVICE_ACCOUNT > $HOME/.config/gcloud/application_default_credentials.json script: # Download flank and run your tests - wget --quiet https://github.com/TestArmada/flank/releases/download/v7.0.1/flank.jar -O ./flank.jar - java -jar ./flank.jar android run dependencies: - build_dev_debug |
When flank is executed it looks for flank.yml as its configuration. There are a lot of custom settings that are explained on the project’s GitHub page. I strongly recommend having a look there for further optimizations. But the following is all you need to get things up and running.
|
1 2 3 4 5 6 7 8 9 10 11 12 13 14 15 16 17 18 19 20 21 22 23 24 25 26 27 28 29 30 31 32 33 34 35 36 37 38 39 40 41 42 43 44 45 46 47 48 49 50 51 |
# gcloud args match the official gcloud cli # See the docs for full gcloud details https://cloud.google.com/sdk/gcloud/reference/firebase/test/android/run gcloud: # -- AndroidGcloudYml -- ## The path to the application binary file. ## The path may be in the local filesystem or in Google Cloud Storage using gs:// notation. ## Android App Bundles are specified as .aab, all other files are assumed to be APKs. app: app/build/outputs/apk/debug/app-debug.apk ## The path to the binary file containing instrumentation tests. ## The given path may be in the local filesystem or in Google Cloud Storage using a URL beginning with gs://. test: app/build/outputs/apk/androidTest/debug/app-debug-androidTest.apk ## A list of DIMENSION=VALUE pairs which specify a target device to test against. ## This flag may be repeated to specify multiple devices. ## The four device dimensions are: model, version, locale, and orientation. device: - model: Nexus6P version: 26 locale: en orientation: portrait flank: # -- FlankYml -- ## test shards - the amount of groups to split the test suite into ## set to -1 to use one shard per test. default: 1 max-test-shards: 5 ## The project id project: testlab-test-sunflowers |
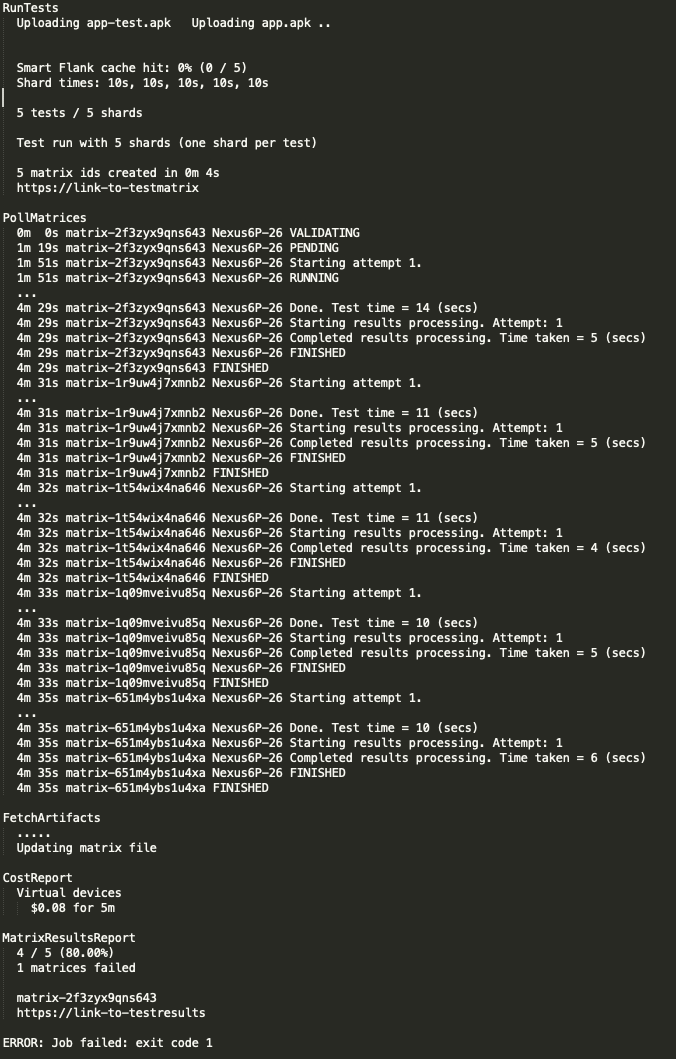
When the pipeline is running, some log data about the current state will appear in your console. After the execution finishes there will be a link to the test report to verify the results. Here is the output for a test run with one shard/test. The job failed because one test didn’t finish successfully. The logs don’t show exactly which tests failed, you have to check the test report to analyze them in detail. If you look at the timestamps you can see that the shards all finished almost at the same time. The more tests you have the more time you can save executing them.
Pricing
One important thing to notice is the pricing model of Firebase. In the free plan you can execute 5 test runs per day on a real device and 10 test runs on a virtual device. While this may be enough if you execute the whole test suite at once (in 1 shard) you’ll run out of capacity pretty fast once using multiple shards. For example if you have 20 UI tests and run them on 3 shards on real devices there are still 2 test runs left. If you use 5 shards the free capacity is gone, as every shard is treated as a separate test run. In the Blaze plan you pay as you go. They charge $1/device/hour for a virtual device and $5/device/hour for a real device. A thing to note here is that the usage time gets rounded up by minute which means if you use the device only for a couple of seconds you will still be charged for one minute.
Luckily Flank has some optimizations for this kind of pricing that can be enabled in the flank.yml. When activated, Flank will try to create shards that run closely to full minutes. The following is documented on the github page of flank as well.
|
1 2 3 4 5 6 7 8 9 |
## shard time - the amount of time tests within a shard should take ## when set to > 0, the shard count is dynamically set based on time up to the maxmimum limit defined by max-test-shards ## 2 minutes (120) is recommended. ## default: -1 (unlimited) shard-time: -1 |
Summary
Setting up the Firebase TestLab and Flank is pretty easy following the steps above. Running the UI and instrumentation tests automated on the CI server on a regular basis adds a lot of value and potential bugs can be caught quickly. Furthermore you can save a lot of time because you don’t need to execute the tests on your local machine so often. So I encourage you to give it a try and see if it fits your needs.
Read on
Need support in your app project? Have a look at our mobile offering! If you like to get your hands dirty yourself consider joining us as an Android dev!


